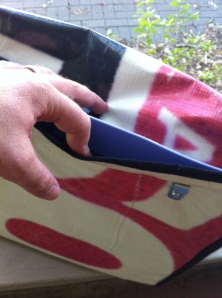
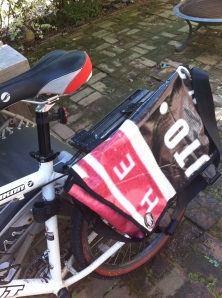
I’m still not sure if I pronounce pannier correctly (is it the French “pan-yay” or the Indian cheese “paneer” or the way it looks to me “pan-year”), but after a few tries I have a messenger bag that I can attach to my bike. Here’s what I did:
1. Bought a messenger bag online from Atlanta-based Gorilla Sacks.
2. Looked online for advice on making a pannier. I just Googled “DIY pannier” and found several helpful sites.
3. Gathered materials. I used the top of an unused plastic storage bin to create a stiff back. Bought a grommet kit, mirror hooks, nuts, bolts, washers, gaskets, a bungee cord, and a laptop sleeve.
3. I bought a bag that had a back pocket so I could easily create a hard flat surface by sliding in a sheet of plastic. I cut the container top to fit and then secured it with the bolts for the hooks. I used washers and gaskets to theoretically waterproof the holes I was making. Probably should have used a better tool to punch the holes through the vinyl of the bag and the plastic sheet. I used a screwdriver and a skewer.
4. Bolted in the laptop sleeve on the inside of the bag.
5. Immediately realized that the plastic by itself wouldn’t be stiff enough. Looked around the basement until I found a very light mesh metal piece that was a divider for a storage unit that we weren’t using. I guess that gives me a good justification for not throwing stuff away.
6. Put grommets into the outside layer of the bag to put in a bugee cord. Had to cut cord to shorten and to be able to slide through the grommets. Used a small cable tie to secure the cut end.
7. Thought I was ready to go.
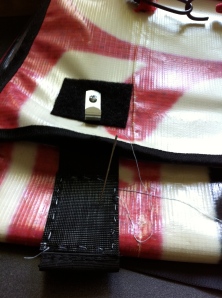
8. I could ride around in circles in the parking lot across the street, but I knew I would need some modifications to make it less dangerous for commuting and more comfortable for walking around. The straps that held down the front flap were too long, and the hooks dug into my back when I slung it over my shoulder. I decided to kill 2 birds with one stone and use the excess lengths of straps to create straps to cover the hooks. Just needed some velcro and needle and thread.
Cut the bottom straps. Burned all the frayed edges, made a small fold, and sewed together.
9. Used the excess to create top straps for covering hooks when not on bike. Bolted the straps in under the hooks. The velcro wasn’t sticky enough, so I either bolted or sewed to secure it.
10. Thought I was finished.
11. Actually, knew I wasn’t finished. The comfort issue was fixed. But, again, I could ride around safely in the parking lot across the street, but for my commute I had to secure the bag further with an extra bungee. The hooks were too small and the 2-hook bungee on the bag was unbalanced. Tightening the bungee on one side would make the other side too loose at the top. Also, because the bungee had a lot of tension on it, the grommet eventually ripped through the vinyl.
I bought some bigger hooks. Had to tighten them with a vise because otherwise they hung too loose. Also moved to one bungee hook in the middle (just tied a knot on the inside). Put the grommet through the vinyl and the plastic to make it stronger.
12. I was able to ride to work, but I still had to use the extra bungee because the larger hooks made the bag hang lower. While pedaling, the back of my foot would hit the bag, eventually knocking it loose.
I lowered the hooks to raise the bag. Also made the bungee shorter for more tension. Earlier, I had also decided to velcro in the laptop bag instead of bolting it.
13. I rode to work twice this week with no problems.
Let’s Go!


This is great! where can i purchase the hooks. Theyve been a pain to find
Sorry to get back to you so late on this. About a week after you commented I got hit by an SUV on my bike commute. Be careful out there. Look for the “Jandd Pannier J Hook with Rubber Protector” on Amazon. They are just a couple bucks each.